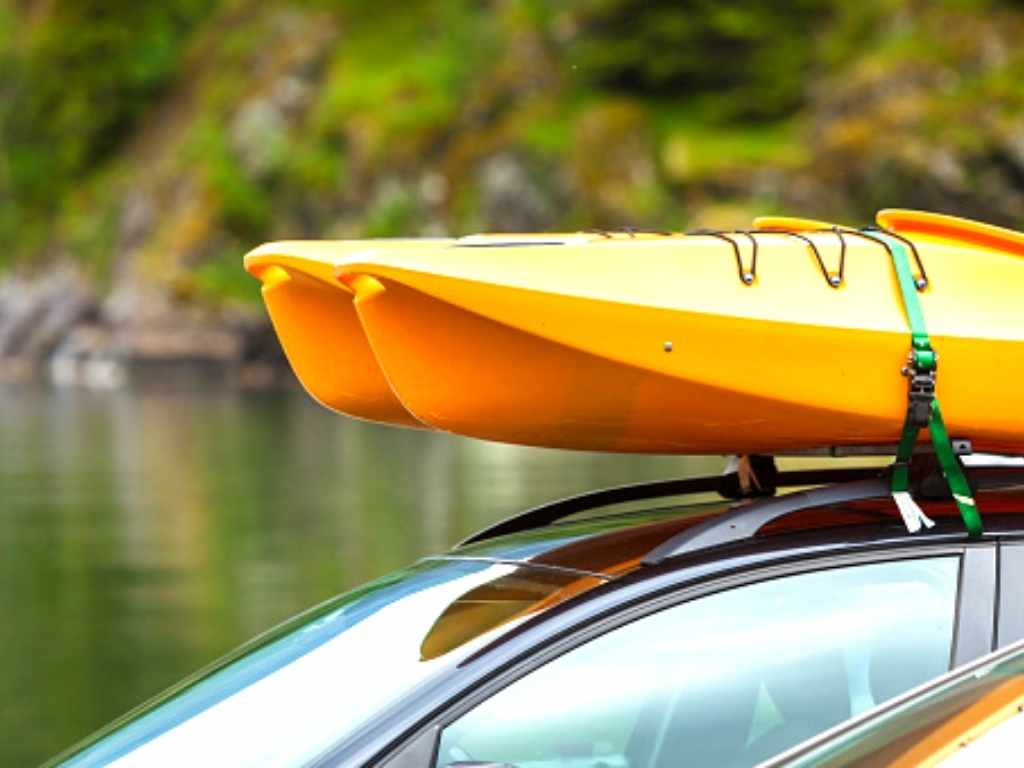
Taking a 14-feet long kayak out on an adventure isn’t an easy task. Even if you manage to buy a roof rack, there are a number of reasons why you shouldn’t in the first place.
Roof racks are generally expensive. Instead of buying one, we’ll suggest you save that money, invest it to buy a batter kayak, and make a roof rack yourself.
Yourself? Is it that easy? Yes, it is. With a few easy-to-obtain supplies, you can get your kayak hanging with your car in no time at all.
Make sure to stay with us till the very end, and you’ll be making your own DIY roof rack yourselves!
Table of Contents
Transporting A Kayak Without A Roof Rack
Kit List
All of the items listed below are easily available in most hardware stores, but if you’re lazy like me, you’ll prefer to order them online. For your ease, we’ve also added an Amazon link to all of the items listed below.
-
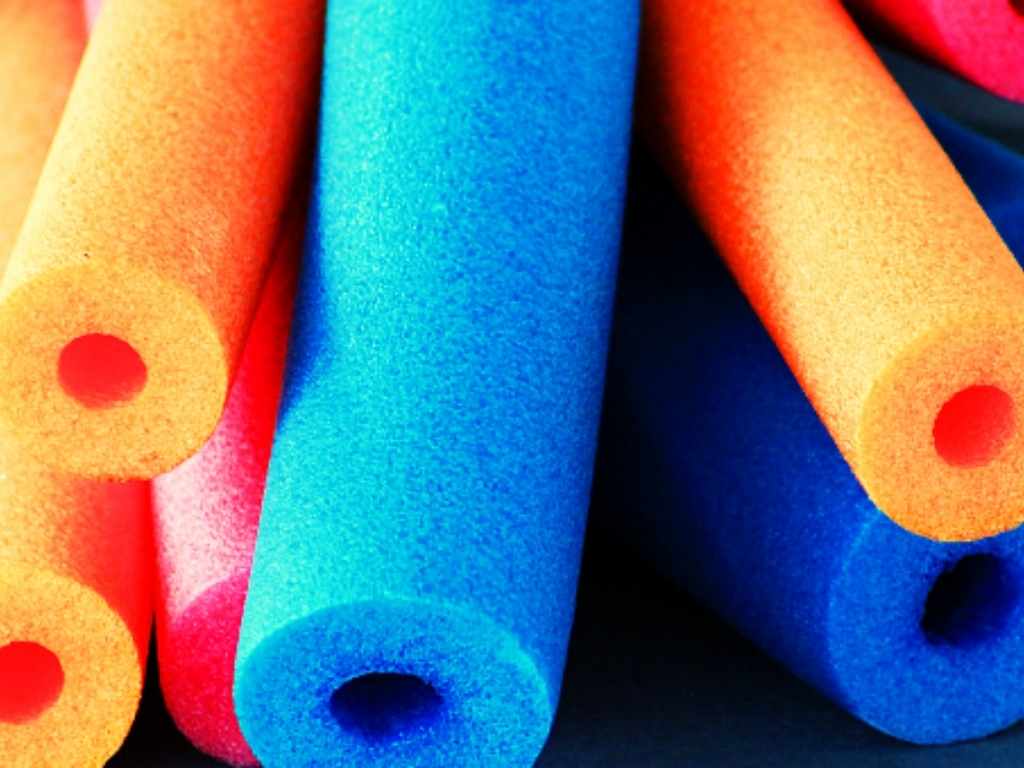
Pool Noodles
Yes, you’ll need some pool noodles (, or any other soft polystyrene tubes with a hole in the middle) to build a sturdy, durable car rack of your own. These items are easily available in any supermarket, outdoor store, or even hardware store. Make sure to choose a thick heavy-duty tube, with enough length to extend over your car.
Pool Noodle Length
How to choose the right pool noodle length for your kayak?
Most people end up cutting the pool noodles or joining two or more noodles to fit the car width. But, you can skip this part. The length of the pool noodle needs to be able to fit the kayak with a minimum of 3 feet on both sides.
All you need to know to choose the best pool noodle length for your kayak is that it should be 6 feet more than the total kayak width.
-
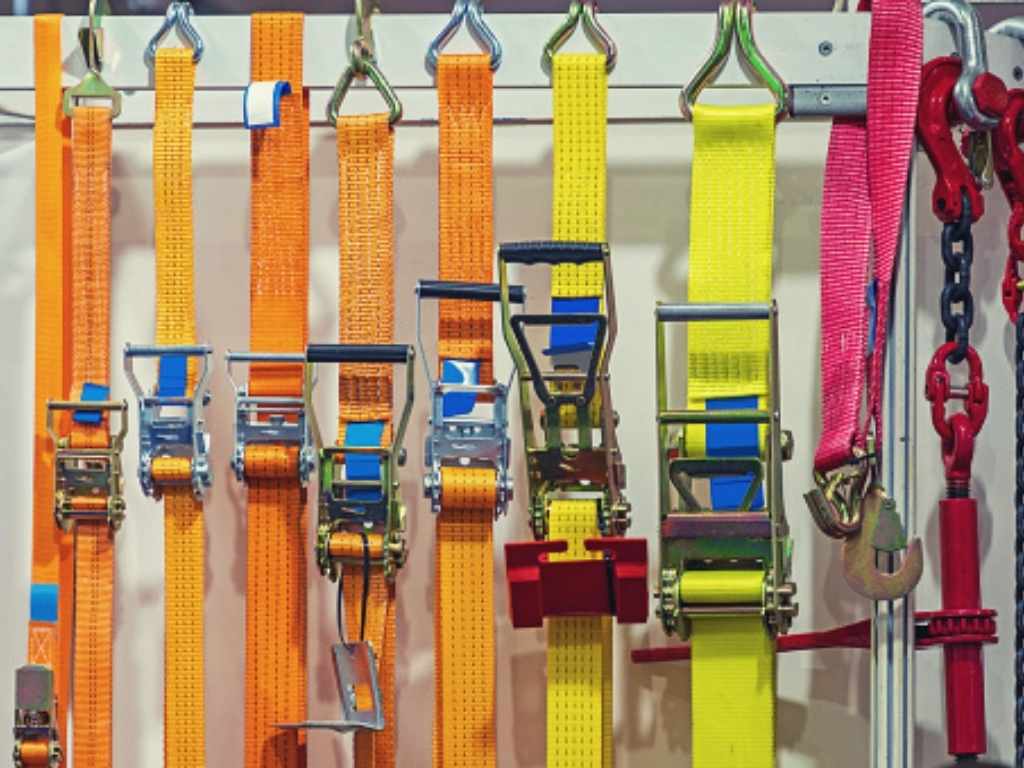
Cam Buckle or Ratchet Straps
Cam buckles are one of those everyday items, that might not sound like much of a big deal. But, they do play a crucial role in our life. Made up of sturdy durable and heavy-duty polyester, they are mostly used in transportation or holding place equipment of different dimensions.
However, we will be using them to build our own car rack. The cam buckles or ratchet straps can be found in any automotive or hardware store. To build a car rack for your kayak, you’ll need about 3 to 5 of these things.
How To Use A Ratchet Strap?
Though the ratchet straps play a crucial part in transportation, most people don’t know how to use them properly. Consequently, the ratchet straps may end up being jammed. To save yourselves from this pain, just follow the following instructions:
- Release the lever to open the ratchet.
- With the buckle opened, thread the strap through the bottom of the ratchet
- Continue pulling the strap through the bottom until it eels taunt
- Return the lever into the closed position to lock the strap in place
Step 1. Secure The Pool Noodles To The Top Of Your Vehicle
First of all, you have to secure the pool noodles on the top of the car. Make sure that the pool noodles fit significantly across the width of the car. If there’s any amount of noodle protruding on either side, you’ll need to cut it down to fit.
The pool noodles on the top of the car provide a flexible and durable base, protecting the car from accidental bumps.
Once you have the noodles according to the required size, place one of them in the middles, and the other two at the front and rear, approximately 3 feet away depending upon the length of the car.
Once in place, run one of the rachets through the hole, and then through the inside of the car with the door opened. You might need a broomstick or fishing rod for this purpose. Repeat the same procedure with the rest of the pool noodles.
With this step completed, you’ll have a stable floor for your kayak to sit on. This provides safety to your car against bumps on the road.
Step 2. Load The Kayak On The Top Of The Roof
Once the pool noodles are secure, the next step is to load the kayak on the roof. However, you might need a little help from another friend or kayaker to lift the kayak. Especially whitewater kayaks are usually heavy, so this part is best done by two people.
Flip the kayak so that the cockpit is facing downwards, and with one person on each end, lift it and place it on the pool noodles. The pool noodles will help to keep the kayak secure, and will also prevent the kayak from damaging your vehicle.
Step 3. Secure The Kayak With Straps
Now that you’ve placed the kayak on the pool noodles, the next step is to secure it with ratchet straps. Open the doors of your vehicle, and pass one strap over the kayak from the front door.
Tighten the strap from the inside of the car. Make sure to twist the strap before you tighten them. In this way, you’ll prevent them from making a high pitch noise while driving the vehicle.
Repeat the process from the rear door. Remember not to tighten the ratchet straps too much. Otherwise, it may damage the hull shape of the kayak or the roof of your vehicle.
Also, remember to place the buckles in an easy-to-reach place so that you can adjust them on the ride. If you’re driving in a cold climate, the straps may loosen, and you’ll need to tighten them through the journey.
Tips On How To Secure A Kayak In The Right Way?
First of all, make sure not to tighten the straps too much. Tightening a strap more than desired can lead to damaging the hull of the kayak, especially if it is made up of plastic. Overall, the distorted hull shape can affect the performance of the kayak on the water.
Temperature and climate can loosen your strap. Especially if you’re moving from a high temperature to a low temperature, or are driving in a rainy environment. Make sure to check the strap at each stop.
With time, the nylon ends of the straps can wear off. Such straps aren’t easy to pass through the buckle. This problem can be fixed by heating the strap end to an open flame and then pressing it with a flyer. The burnt nylon end will become flat, and will easily pass through the buckle.
Step 4. Securing The Bow And Stern
With the kayak secured from moving left and right on the journey, the last thing you want to do is to prevent your kayak from slipping over from the front or rear even if you have to brake suddenly.
To secure your kayak perfectly, stretch another pair of straps through the carry handles or tow bars, and secure them underneath the vehicle to the tie-down spots, with either a securing hook or carabiner.
Conclusions
Securing the kayak on the top of the roof is something every kayaker has to master. Thankfully, with some easy to obtaining accessories, we’ve come up with the best possible cheap way to transport your kayak!
Let us know in the comment box below how much you liked our content and what was your first kayak transporting experience 🙂