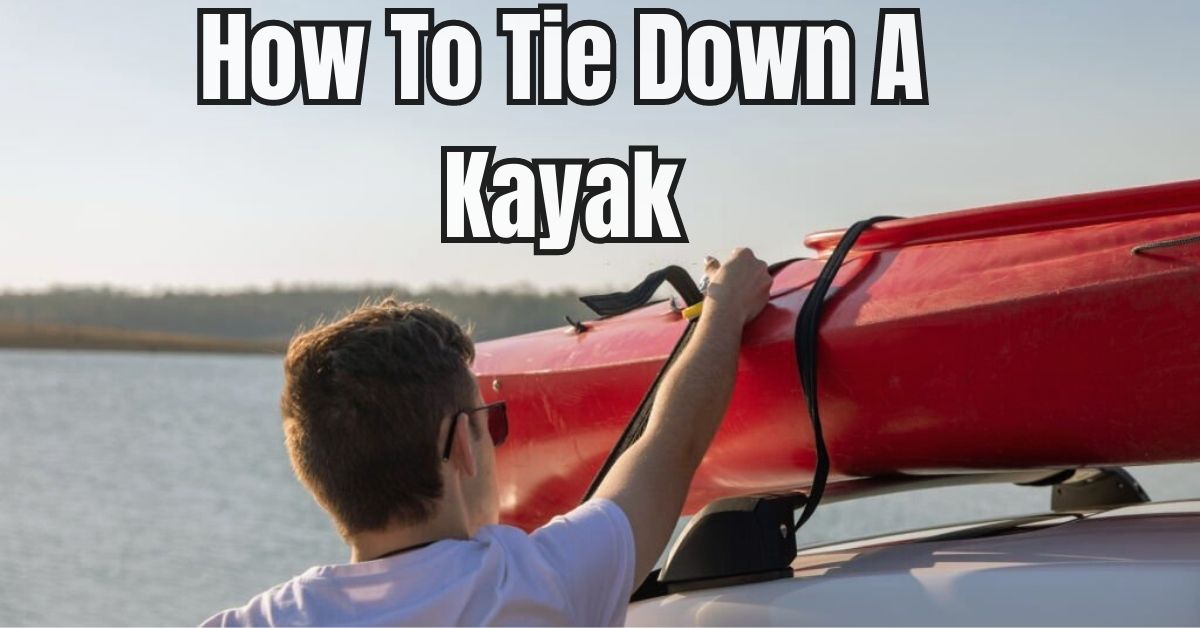
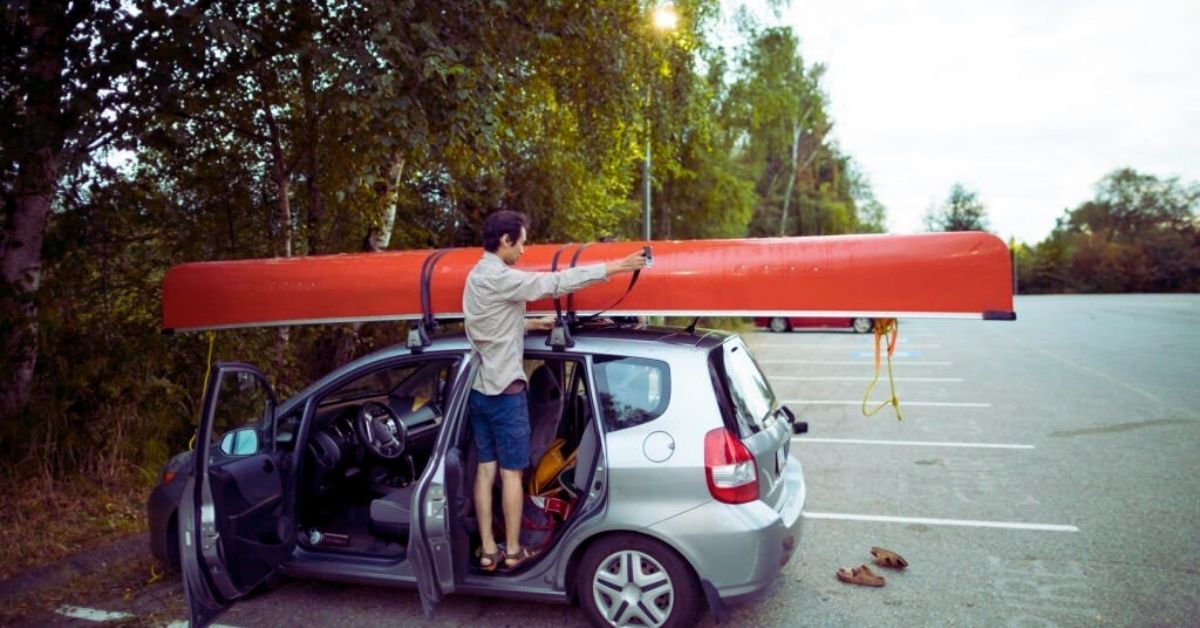
Explore nature and enjoy the outdoors with kayaking. Kayaking is fun for all ages and ability levels, whether you’re on a river or lake. Before you go, ensure sure your kayak is securely attached to your vehicle or truck.
Kayak tying might be frightening for beginners, but with some basic instructions, you can become an expert in no time.
We’ll cover everything about How To Tie Down A Kayak, from strap selection to kayak security, in this article. Learn how to knot your kayak and paddle safely.
Table of Contents
1. How to tie a kayak
Every kayaker must learn kayak tying. Understanding how to secure your kayak may make a big difference in assuring a safe and fun water journey, regardless of your expertise.
Kayak tying secures your kayak to a roof rack or trailer for travel. It may appear straightforward, but without correct skills and equipment, your kayak might get loose or damaged during transport.
Here are some kayak tying instructions to help you get started. We will cover everything from choosing tie-down straps and ropes to mounting your kayak on your car.
This instruction will give you the skills and confidence to properly tie down your kayak, letting you enjoy paddling without worrying about your gear.
Let’s learn about kayak tying to prepare for your next water experience, whether you’re going kayaking or taking a weekend trip to a neighboring lake.
Choosing the Right Straps and Ropes
Securing your kayak for safe transportation requires choosing the right straps and ropes. It’s essential to opt for strong, durable materials that can support the weight of the kayak.
Look for high-quality straps with sufficient length to wrap around both the kayak and the roof rack.
Additionally, ensure that the ropes are thick enough and securely tied to prevent any slipping while on the move. Regularly inspect these straps and ropes, replacing them if any signs of wear or tear are detected, in order to maintain optimal safety standards.
2. Understanding the importance of proper kayak tying
Tying your kayak properly protects your gear and gives you peace of mind on the water. You need to be sure your kayak will remain put while moving it on a trailer or vehicle top.
It’s crucial to tie your kayak properly to avoid accidents and damage. Without adequate tying, your kayak might move or come free during transit, causing traffic accidents. Your kayak and other vehicles might be severely damaged, as well as you and others.
Proper tying also involves keeping your kayak steady and balanced when moving. Instability from uneven weight distribution increases accident and damage risk. You can equally distribute weight and secure your kayak by tying it down properly.
Proper kayak tying also prevents wear and tear. Movement and shifting during shipping may scrape, dent, and damage your kayak’s hull and attachments. By securing your kayak, you can reduce these hazards and maintain its condition.
Cleaning the kayak and removing any loose items
Before securing a kayak, it’s important to clean the vessel and remove any loose items. This involves carefully removing debris or dirt that may have accumulated on the kayak’s surface, as well as getting rid of any objects that could be risky during transportation.
A thorough and detailed approach is crucial to guarantee the safe transport of the kayak. By following these guidelines, you can effectively prepare your kayak for tying down and transporting it securely.
3. Essential tools and equipment for kayak tying
High-quality kayak straps or tie-downs are essential. These straps should be strong, adaptable, and heavy-duty to secure your kayak. Look for nylon or polyester straps with durable buckles or cam buckles for easy tightening and releasing.
1. Bungee cords and deck lines are important accessories for securing items to your kayak’s deck. Bungee cords offer flexibility and convenient access to your gear, while deck lines provide more secure tie-down points.
2. Carabiners and hooks are essential tools for securely attaching items to bungee cords or deck lines. It’s important to choose marine-grade or corrosion-resistant options that can withstand the elements.
3. Straps with cam buckles are a useful tool for securing larger items to your kayak. They offer versatility and ease of adjustment, making them a convenient option.
4. Securing your kayak during transportation is important. Some kayaks have built-in tie-down points or attachment loops, while others may require aftermarket attachment points for a secure hold.
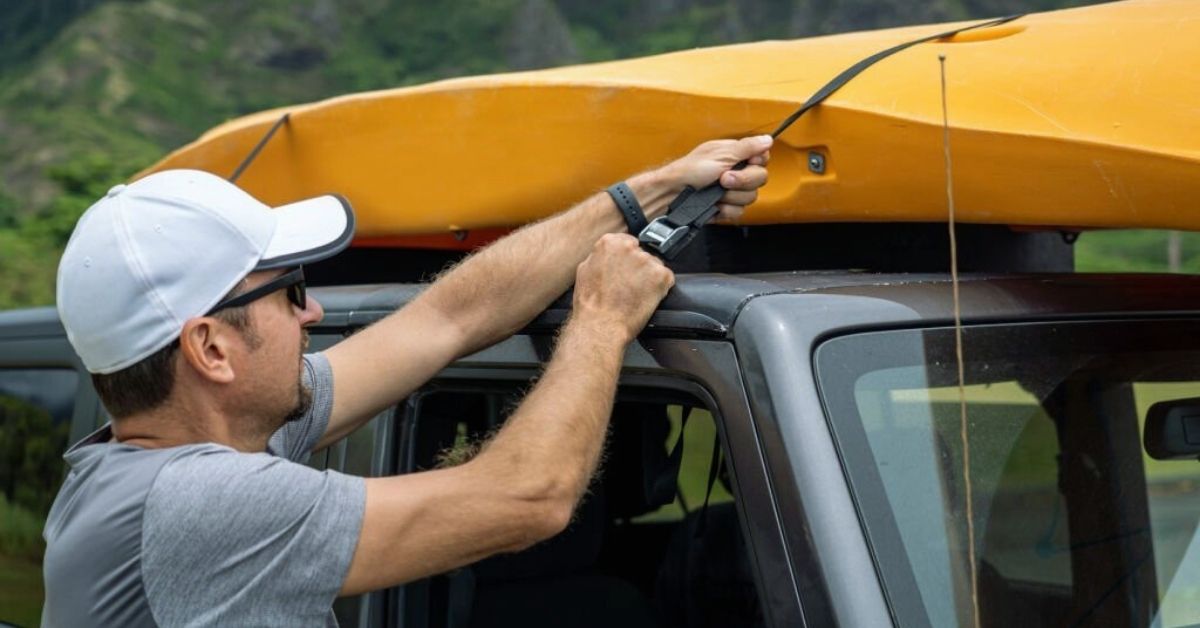
Finally, a good ratchet or tensioning mechanism simplifies strap tightening and fastening. These solutions make it easy to change the tension and attach your kayak to your car.
Look for ratchets or tensioners with a smooth, easy-to-use mechanism and a large weight capacity to manage your kayak.
4. Choosing the right type of rope or strap
Choosing the correct rope or strap is essential for kayak tying. The ropes or straps you employ will influence the kayak tie-down system’s strength, security, and longevity. Make the proper decision with these key tips and methods.
First, consider rope or strap material. Nylon is used for kayak tying owing to its strength and longevity. It resists UV radiation, dampness, and abrasion, making it outdoor-friendly.
Polypropylene is lightweight and mildew-resistant. However, it is weaker than nylon and may disintegrate in sunshine.
Next, evaluate rope or strap thickness or diameter. Tensile strength and security increase with thicker ropes or straps. However, bigger ropes may be harder to knot and untie, particularly in compact locations. Strength and usability must be balanced.
Also consider the rope or strap’s load capability or weight rating. Make sure it can securely support your kayak and other stuff. Most respectable manufacturers provide load capacity, so verify the specs before buying.
Additionally, choose the appropriate fastening mechanism or hardware for your purposes. Some ropes have hooks or carabiners, while others need tie-down straps or buckles. Choose an easy-to-use device that secures your kayak to the roof rack or trailer.
Finally, evaluate the rope or strap’s quality and structure. Look for reputable companies with high-quality merchandise. Before each usage, check for fraying, weak places, or damage to keep your kayak safe during travel.
You’ll master kayak tying by carefully choosing the correct rope or strap. For safe and easy kayaking, consider strength, durability, and simplicity of usage.
5. How to tie a simple kayak knot
Every kayaker should know how to tie a simple knot. Whether you’re a novice or an expert, securing your kayak may improve your kayaking experience. This step-by-step instruction will teach you how to tie a simple knot to secure your kayak.
Step 1: Place your kayak in a solid, non-rolling spot. This might be on the ground, a kayak rack, or your vehicle.
Step 2: Pass a strong kayak strap or rope beneath the hull. Center and properly spread the strap over the kayak.
Step 3: Loop both strap ends over the kayak.
Step 4: Form a “X” on the kayak by crossing the strap ends.
Step 5: Thread the left end through the right loop. Thread the opposite end through the left loop.
Step 6: Secure the kayak by pulling both strap ends firmly. Check for strap slack and adjust.
Step 7: Knot the strap after tightening. A basic and useful knot is the square knot. Cross the strap ends and knot overhand. Cross the ends again and create another overhand knot. This will secure your kayak with a tight knot.
Step 8: Tugg the strap one more time and make sure your kayak is sturdy and fastened.
These step-by-step instructions will help you create a simple kayak knot that will secure your kayak during travel or storage. Practice makes perfect, so learn these methods and always consider safety while locking your kayak.
6. Advanced kayak tying techniques for added security
After mastering basic kayak tying methods, you may wish to try advanced ways for further security. These methods may keep your kayak safe and protected in tough weather.
Advanced techniques include double loop knots. This knot includes making two loops and passing the rope ends through them twice before tightening. For fastening heavy kayaks or paddling in turbulent seas, the double loop knot is strong and stable.
Trucker’s hitch is another difficult method. Truckers use this knot to secure goods, but kayakers may use it too. The trucker’s hitch makes rope tightening easier mechanically. Using a roof rack or trailer to carry your kayak is extremely beneficial.
You may also use kayak straps or tie-downs. These kayak-specific systems include quick-release buckles, adjustable straps, and cushioned protection. They safeguard your kayak during travel, providing ease and peace of mind.
Before your excursion, check your kayak tie configuration. Check ropes, knots, and straps for wear and weakness. Also, follow manufacturer instructions for tying down your kayak type.
These advanced kayak tying methods may improve your kayak’s stability and security, letting you enjoy your paddling experience. Explore new waters safely and confidently with your kayak tied and ready for any adventure.
7. Sit-on-top, sit-inside, and inflatable kayak security tips
Securing your kayak is crucial for a safe and enjoyable water excursion. various kayaks need various fastening methods. Here are some kayak tying instructions for sit-on-top, sit-inside, and inflatable kayaks.
Sit-on-top
Sit-on-top kayaks need a close fit. Start with foam blocks or cradles on your car’s roof for stability. Place your kayak on the foam blocks, centering it and aligning it with the car.
Loop cam straps or ratchet straps through the scupper holes or around the hull to fasten the kayak to the roof rack. Gradually tighten the front and rear straps to secure the kayak.
Sit-inside
Sit-inside kayaks need cockpit and hull protection. To protect the kayak’s hull, cushion the roof rack with foam padding or pool noodles.
Place the kayak on the foam cushioning and line it with the car. Secure the kayak to the front and rear of your vehicle using bow and stern lines to prevent movement.
Loop cam straps or ratchet straps through the grasp handles or hull to fasten the kayak to the roof rack. To preserve the kayak, tighten the straps but not too much.
Inflatable kayak
Due of their flexibility, inflatable kayaks demand a different strategy. Inflate your kayak to the manufacturer’s specifications and make sure it’s stable.
Center and position the kayak on your car’s roof. Loop cam straps or ratchet straps through D-rings or inflatable chambers to fasten the kayak to the roof rack.
Tighten the straps gradually to fit snugly without overinflating the kayak. Take bow and stern lines to provide stability during shipment.
No matter your kayak, double-check your tie-downs before driving. Make sure straps, buckles, and knots are tight and in excellent shape. Check for wear and replace worn equipment immediately.
By following these guidelines for securing various kinds of kayaks, you may rest certain that your kayak is secure during transit and enjoy your paddling experiences.
8. Avoid these kayak tying errors
Avoid typical blunders while tying a kayak securely for a safe and easy ride. While it may seem simple, many beginners and even expert kayakers stumble into difficulties. By knowing these errors and taking measures, you can easily tie kayaks.
Use of inappropriate knots is a typical blunder. Learning and using kayak-securing knots like the bowline knot or trucker’s hitch is crucial.
Incorrect or weak knots might loosen or separate your kayak during transit, creating a serious road safety issue.
Insufficient tension is another error. Even with the right knots, not enough tension on the straps or ropes might cause your kayak to move or loosen when transporting. Thoroughly tighten the straps to secure the kayak.
Another typical mistake is not protecting your kayak from abrasion. Use foam or pool noodles to shield your kayak from the roof rack or other contact points while tying it. This protects your kayak’s surface from scratches and dings.
Additionally, do not overburden your kayak or exceed the manufacturer’s weight limitations. Overloading your kayak may strain the tie-down points and reduce stability. Check the weight capacity of your kayak and distribute the weight equally to preserve balance and avoid tying tension.
Finally, forgetting to check and recheck your knots and ties before driving might have deadly repercussions. Check your kayak’s ties and knots often throughout your trip to make sure they haven’t loosened due to vibrations or other causes.
Be aware of these typical blunders and take care to tie your kayak securely and prepare it for any expedition. Learning kayak tying is convenient, safe, and protects your investment in this treasured boat.
9. Safety measures for kayak tying and transport
When tying and transporting your kayak, safety is paramount. It may seem simple, but neglecting safety rules may cause accidents and damage to your kayak or car. Essential safety advice and tricks:
• High-quality kayak tie-down straps: Choose weatherproof, sturdy straps. Makeshift ropes and bungee cords may not be strong enough.
• Check your kayak and gear before tying it down for damage, cracks, or loose fittings. Keep paddles and life jackets in the kayak or in your car.
• Tie your kayak to robust vehicle anchor points like roof racks or trailer attachments. Avoid connecting it to plastic components or antennae that might harm it.
• Use correct tying techniques: Center and line the kayak on the roof racks or trailer with the vehicle’s length. Secure the kayak’s ends using bow and stern lines to prevent lateral movement. Secure the kayak from side to side using tie-down straps without overtightening.
• Check tie-downs regularly: Stop and check straps and knots during your trip. Over time, vibrations and wind resistance loosen straps. They should be adjusted and tightened to keep the load steady.
• Height and weight restrictions: Be aware of bridges, tunnels, and overhanging structures. Make sure your kayak and car are legal heights. To avoid overloading, evaluate your roof racks or trailer’s weight capacity.
• Consider your surroundings while moving your kayak, particularly when changing lanes, turning, or braking. The kayak’s weight and height might impair vehicle control and vision. Be cautious of other drivers and keep a safe distance to avoid accidents.
By following these safety procedures, you may tie and carry your kayak safely and securely to your next water trip.
10. Care tips for your kayak tying gear
To prolong its life and performance, kayak tying gear must be properly maintained. These recommendations can help you maintain and care for your kayak gear for your next journey, whether you’re a beginner or an expert.
Always rinse your kayak tying gear after use. Saltwater, sand, and grime corrode hardware and materials. Pay care to buckles, straps, and ropes as you rinse off salt and dirt with fresh water. A simple action may avoid premature wear and tear.
Maintaining your gear requires regular checkups. Check for fraying, worn parts, and loose stitching. Focus on high-stress places like connecting points and buckles. Repair or replace damaged components immediately.
Storage is another important part of kayak tying gear maintenance. Keep gear cool, dry, and out of direct sunlight. Extreme heat and sunshine damage materials. To organize and preserve kayak tying gear, use a gear bag or container.
Lubricate your gear’s buckles and ratchets regularly. This prevents corrosion and ensures smooth functioning. Avoid material damage by using silicone-based or manufacturer-recommended lubricants.
Finally, always follow the manufacturer’s care and maintenance recommendations. Cleaning and maintaining equipment may need particular procedures or supplies. These tips will help you maintain your kayak tying gear and keep it ready for your next trip.
Regular maintenance and cleaning of your kayak tying gear increases its lifetime and assures your safety and equipment dependability on the water. So take time to care for your gear and have more enjoyable water adventures.