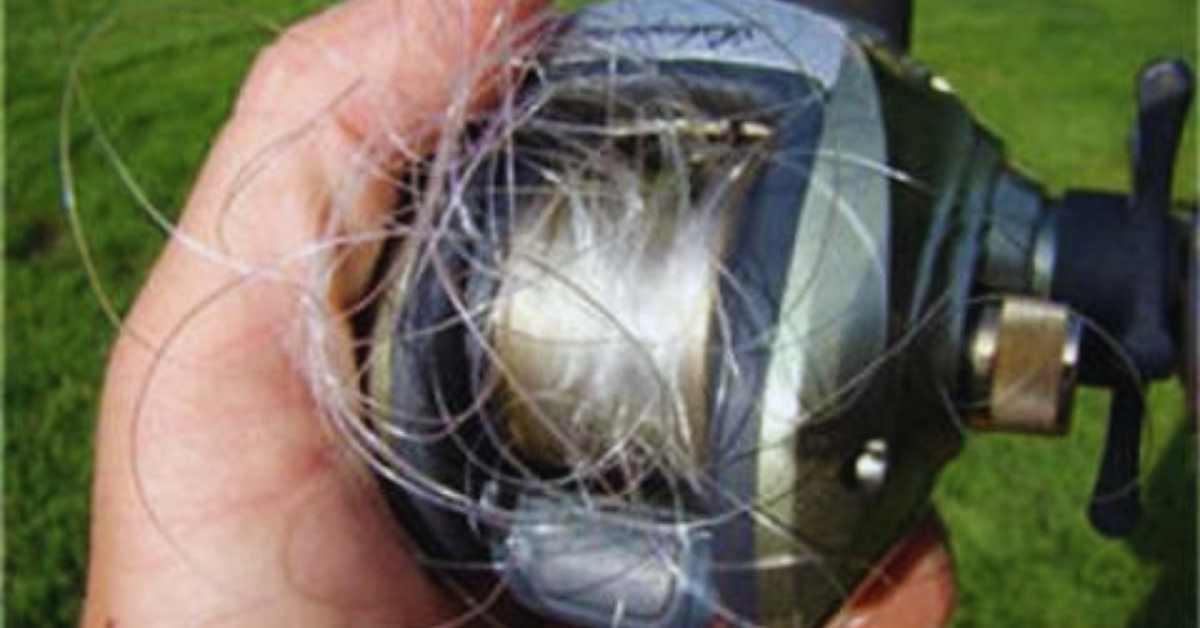
In this article, we will explore three simple techniques that experienced anglers use to effectively Remove a Birdsnest from a Baitcaster. With some practice, these methods can be easily executed.
It’s essential to address a birdsnest promptly as it can cause significant damage to your fishing line and reel.
Therefore, having a basic understanding of how to remove it is crucial. By following these three easy tricks, you can swiftly and efficiently eliminate a birdsnest from your baitcaster and resume fishing without delay.
Table of Contents
1. Removing a Birdsnest from you Baitcaster Reel
Removing a birdsnest from a baitcaster reel requires careful and precise steps. First, the angler needs to disengage the spool tension knob and take out the spool from the reel.
Then, they should untangle the line carefully, ensuring that all knots and tangles are removed.
Once the line is untangled, they can insert the spool back into the reel and readjust the spool tension knob.
It’s crucial to approach this process with patience and attention to detail in order to prevent any damage to the reel or fishing line.
2. How to cast a baitcaster without birdnesting
To prevent birdnesting when using a baitcaster, it’s important to follow some guidelines. These include adjusting the spool tension, choosing the right lure weight, and maintaining a consistent casting motion.
Here are three effective ways to slow down the rotation of the spool on a baitcasting reel:
-
Braking system
Baitcaster reels need brake systems to cast smoothly. However, unanticipated obstructions like a birdsnest might frustrate and hinder the reel.
It takes care and accuracy to remove a baitcaster’s birdsnest. Disengage the reel’s drag and release the tension knob to reduce spool tension.
Gently separate the knotted line with your fingers or needle-nose pliers, being careful not to damage the reel. If the birdsnest is obstinate, remove the spool and manually untangle the line.

Respool the line gently, aligning and tensioning it when the tangle is resolved. Finally, adjust the tension knob and brake system to your casting parameters.
Regularly cleaning and examining your baitcaster reel will reduce birdsnests and make fishing fun.
-
Spool tension
Baitcaster reel spool tension controls line release when casting. Despite proper spool tension, birdsnests may arise.
A baitcaster needs care and gentleness to remove a birdsnest. To reduce spool pressure, disengage the tension knob or dial on the reel side. Next, remove any loose or knotted fishing line loops using your fingers or tweezers.
After removing most of the tangle, carefully spin the reel handle or activate the anti-reverse switch to slowly reel in the remaining line, watching for further snags.
Forcefully tugging the line might aggravate the tangle or destroy the fishing reel. Taking your time and being calm can let you remove the birdsnest and enjoy fishing again.
-
Thumb pressure
A baitcaster’s bird’s nest may be hard and time-consuming to remove, but thumb pressure can make it easy.
When fishing line tangles and knots the spool, a bird’s nest forms. Press the thumb bar or release button to relieve spool tension to fix this problem.
This prevents tangling and simplifies line operation. Next, gently push the knotted line with your thumb. Carefully slide the line back onto the spool, using your thumb to adjust tension and avoid snags.
Too much strain may break the line, while too little couldn’t remove the bird’s nest. By using your thumb and applying the appropriate pressure, you may disentangle the mess and resume fishing quickly.
3. How to set the magnetic brake on a baitcaster
Explain how to adjust the magnetic brake on a baitcasting reel in order to fix a birdsnest tangle. The steps provided will help you achieve optimal performance and avoid future instances of this problem.

Here’s a step-by-step guide on how to set the magnetic brake:
1. Gather Your Equipment:
– Ensure you have your baitcaster reel and the lure you intend to use.
2. Locate the Brake Adjustment Dial:
– Look for the brake adjustment dial on the side of the baitcaster reel. It’s typically labeled as “Brake” or “Brake System” and may have numbered settings.
3. Set the Brake to the Lowest Setting:
– Start by turning the brake adjustment dial to the lowest or minimum setting. This provides the least amount of braking force.
4. Adjust Based on Lure Weight:
– If you’re using a heavier lure, increase the braking force. If you’re using a lighter lure, decrease it.
– Start with the brake setting on the minimum, then gradually increase it until you achieve a backlash-free cast.
5. Perform Test Casts:
– Go to an open area where you can safely practice casting.
– Hold your rod at a 45-degree angle, and press the reel’s thumb release button to disengage the spool.

– Cast with normal force and observe the line as it comes off the reel.
6. Adjust as Needed:
– If you notice backlash (a tangled mess of line), increase the brake setting slightly. This adds more braking force, reducing the chance of overruns.
– If your cast doesn’t go as far as you’d like or feels restricted, decrease the brake setting slightly.
7. Fine-Tune and Practice:
– Continue making small adjustments to the brake setting as needed until you achieve smooth, controlled casts without backlash.
– Practice casting to become familiar with your reel’s settings and improve your casting technique.
8. Maintain Consistency:
– Once you’ve found the right brake setting for a particular lure and casting technique, remember or mark that setting for future use with similar setups.
9. Adapt to Changing Conditions:
– Be prepared to adjust the brake setting when conditions change, such as when using different lures or fishing in varying wind conditions.
10. Regularly Check and Clean:
– Periodically check the brake system for any dirt, debris, or corrosion that may affect its performance. Clean and lubricate as necessary.
Final Words
Finally, ensure the best performance of a baitcaster, it is important to remove any tangles or birds’ nests carefully and precisely.
Mishandling this task can potentially damage the equipment. If needed, it is advisable to seek professional assistance for safe removal.
