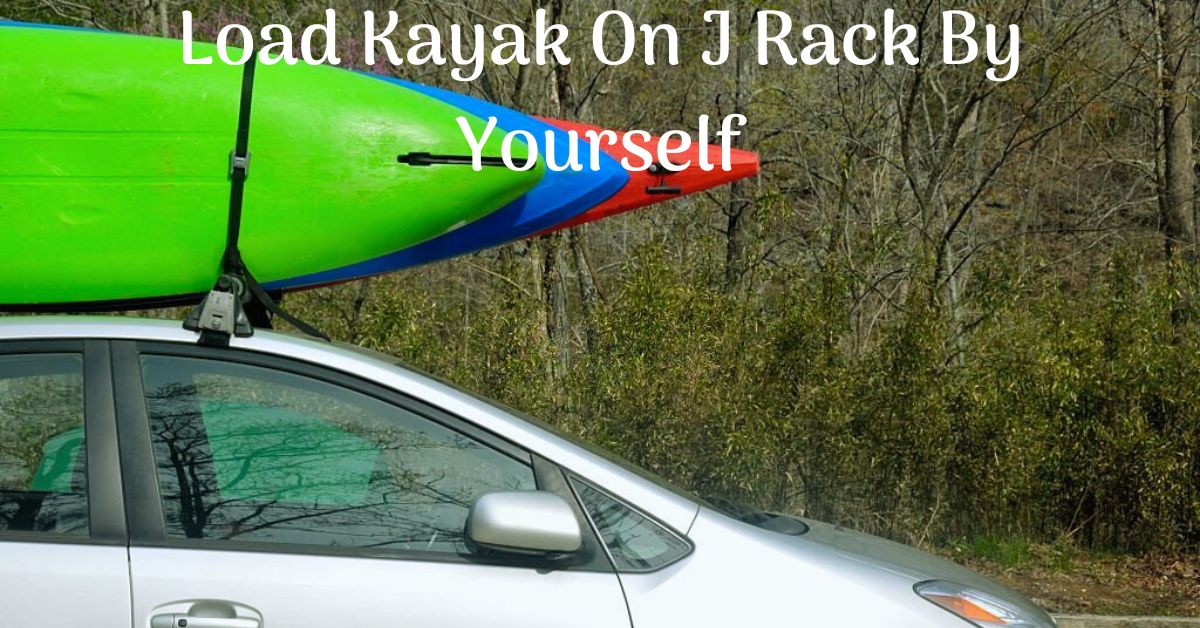
Fun, exciting, and demanding kayaking takes physical effort and technical expertise. Loading your kayak onto your J rack is crucial to kayaking.
It may appear straightforward, but packing a kayak alone may be difficult. Fortunately, with practice and the appropriate technique, you can conquer the single load and start your next kayaking excursion.
Here’s the best way to Load Kayak On J Rack By Yourself. We’ll cover kayak preparation, rack lifting, and kayak security. Read on to master the solo load and prepare for your next kayaking expedition, whether you’re a novice or an experienced kayaker.
Table of Contents
1. Introduction
When doing it alone, loading a kayak onto a J rack might be difficult. To load safely and smoothly, kayakers must learn the solo load method.
Skills and knowledge matter whether you’re going on a solo expedition or loading your kayak without help.
Independence is a major motive to master the single load. You may not have someone to assist you load or unload your kayak on the water. Learning the finest J rack solo loading method will give you the confidence and skill to do it alone, improving your kayaking freedom and flexibility.
The importance of mastering the solo load for kayakers
Solo load method mastery improves safety. Loading a larger or longer kayak is strenuous. Lack of understanding and technique might strain muscles or injure oneself. You may avoid accidents and injuries by following the necessary actions and strategies while loading.
Finally, effective loading saves time and energy. When you master the single load method, you can load and unload your kayak rapidly. This means less equipment trouble and more kayaking fun. Streamlining loading will give you more time to enjoy kayaking and the water’s tranquility.
We will detail how to master the single load on a J rack in the following sections. We will teach you how to load solo kayaks, from gear selection to lifting and balancing. Let’s learn how to master the single load for hassle-free and fun kayaking.
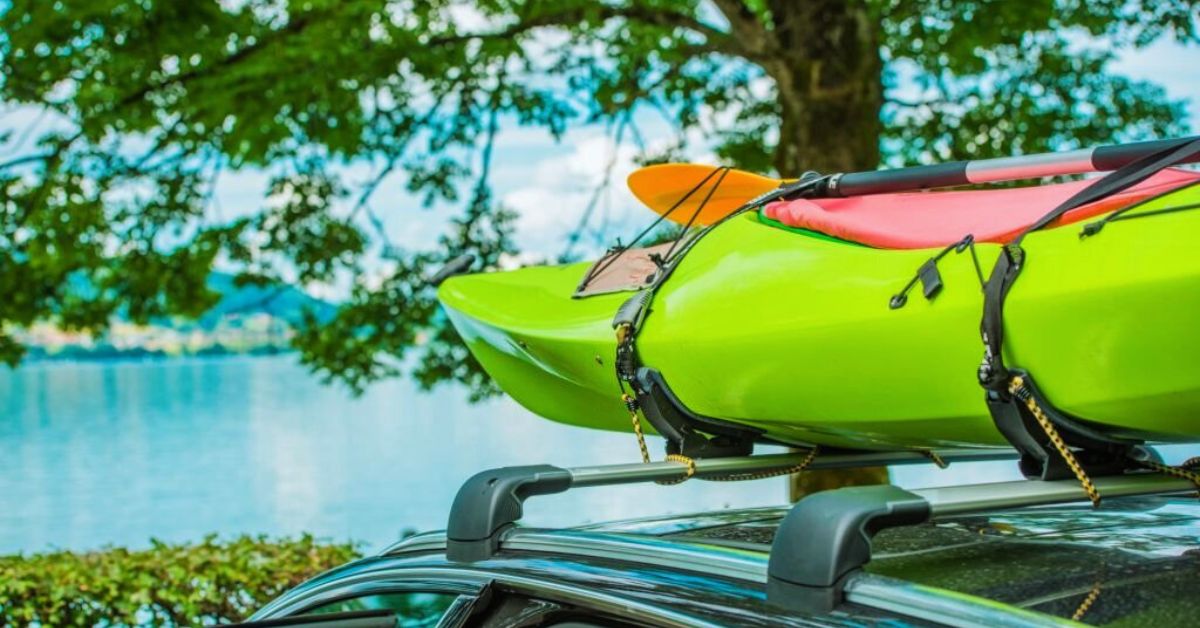
2. Understanding the J rack and its benefits for kayak loading
Solo loading requires knowledge of the J rack and its advantages for kayak loading. A J rack is a common kayak rack that secures your kayak and makes loading and unloading simple.
1. Space Efficiency
The J-shaped rack lets kayaks stand on their sides, conserving space. For cars with limited roof space, this lets you carry numerous kayaks without taking up too much space.
2. Aerodynamics
Airflow is considered while designing J racks. At an angle, they minimize wind resistance compared to transporting the kayak flat on the roof. It may enhance fuel economy and minimize wind noise while traveling.
3. Stability
The kayak is snug and steady on the J rack’s cradle. The kayak fits tightly in the cradle, preventing transportation shaking. This steadiness is necessary for worry-free long-distance travel.
4. Easy Loading
J rack kayak loading is easier than other ways. The kayak may be lifted onto the rack from the side of the car instead than above since it is angled. This is useful for loading a hefty kayak.
5. Versatility
J racks fit a range of kayak sizes and shapes. They contain adjustable straps and cushioning to secure the kayak and avoid transport damage.
6. Install and remove quickly
Most J racks are straightforward to install and remove. Tool-free setups enable rapid rack mounting and dismounting.
7. Multiple Kayak Transport
Install numerous J racks on your roof rack to haul multiple kayaks. This stacking method lets you carry several kayaks side by side.
8. Visual Appeal
The J rack’s design appeals to many. Your car may seem lively and daring with angled kayaks.
3. Preparing kayak and gear for loading
Before loading your kayak onto a J rack, prepare your kayak and supplies. Take the time to do this to make loading easier and protect your kayak during transit.
First, check your kayak for cracks and damage. Be sure to fix any loose fittings or punctures before placing your kayak onto the J rack. To avoid water mishaps, a kayak must be in excellent shape.
Get all the loading equipment you need. A kayak paddle, life jacket, and straps or tie-downs are standard. Check that each item works and is defect-free. For safety, have extra straps or tie-downs.
Additionally, consider kayak weight distribution. Putting heavy goods at the bottom and lighter ones on top helps stabilize transit. It will also reduce the possibility of your kayak moving or falling off the J rack.
Remove loose materials and accessories that might be damaged or misplaced before packing your kayak. Not securely fastened to the kayak are fishing poles, water bottles, and other personal possessions. This prevents valuables from being damaged or lost.
Finally, put and secure your J rack to your car. Make sure the nuts or screws are snug to provide a solid kayak platform. It will give you piece of mind that your kayak is firmly tied and won’t move during transport.
Preparing your kayak and gear before loading can provide a stress-free and safe kayaking experience. Remember, appropriate planning is vital to solo loading and kayak durability.
4. Step-by-step J rack solo load instructions
Loading a kayak onto a J rack alone might be intimidating. It may be easy with the appropriate method. Here are step-by-step instructions for J rack solo loading.
Step 1: position your car.
Place your car in a suitable area. Place it on flat ground near the water’s edge for easy kayak access.
Step 2: prepare your kayak
Prep your kayak for solo loading before starting. Clean it and remove dirt and water. Securely pack any required items in the kayak.
Step 3: Put the J rack
Install the J rack on your car’s roof. Install it firmly and line it with the roof rack. Make sure the J rack is stable before continuing.
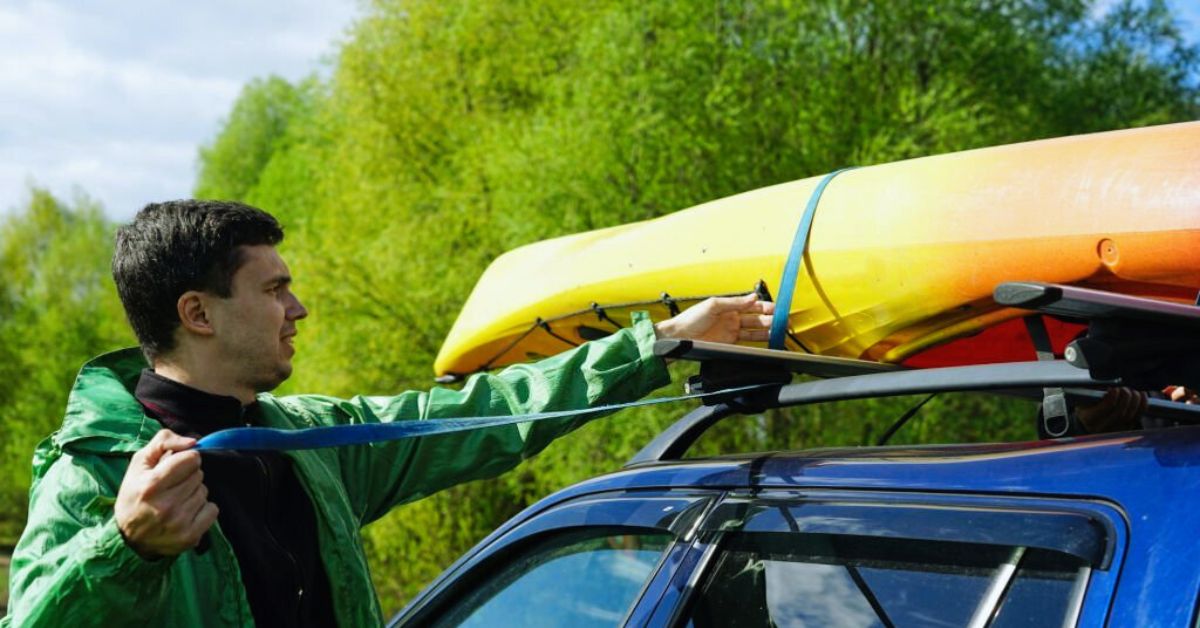
Step 4: Lift kayak onto J rack
From the back of your car, gently hoist the kayak onto the J rack. Balance the kayak by putting one end on the J rack’s lower arm. Then slowly raise the kayak’s opposite end and slip it onto the J rack’s top arm. Take your time and stay in charge.
Step 5: Secure the kayak.
After placing the kayak on the J rack, center and align it. Adjust the kayak for balance and stability. Tightly strap or tie-down the kayak to the J rack.
Step 6: Double-check everything
Double-check connections and security before driving. Secure the kayak to the J rack without movement. Make sure the J rack is firmly fastened to the roof rack.
These step-by-step tutorials will help you master J rack solo loading. Take your time loading and consider safety. Practise will help you load your kayak alone more easily and enjoy your paddling experiences.
5. Tricks for a smooth solo load
Solo kayak loading into a J rack might be difficult. The appropriate approach and a few ideas may help you conquer the solo load and guarantee a smooth and successful experience every time.
• Before loading your kayak onto the J rack, prepare it and the surroundings. Remove any obstructions and fasten the rack to your car. Make sure your kayak is balanced and any loose things are secured or removed.
• There are many ways to make putting the kayak onto the J rack simpler. Approaching the rack from the back is beneficial. You have more control and leverage while raising the kayak onto the rack.
• Be steady and balanced before raising the kayak. Avoid injury by bending your knees and straightening your back. Use a step stool or platform to raise yourself to hoist the kayak onto the rack.
• Make careful you elevate the kayak evenly and utilize your legs and core to support it. Avoid twisting or jerking, which might disturb your balance and make it harder to put the kayak on the rack.
• Make sure the kayak is steady on the J rack after lifting it. Make sure the straps or tie-downs are snug to avoid movement during transport. Before hitting the road, jiggle or pull the kayak to evaluate its stability.
• Buy kayak loading aid devices or sliding pads to make solo loading easier. These items may help you load and unload your kayak without straining your body.
Following these suggestions, you may securely carry a single pack and enjoy aquatic excursions without problem. With practise and expertise, putting your kayak onto a J rack will be easy, letting you enjoy your paddling trip.
6. Avoid these single load blunders
Solo kayak loading into a J rack might be difficult. Solo loading may be mastered with the appropriate technique and practice. To guarantee a smooth loading procedure, avoid frequent blunders at all costs.
Not putting the kayak on the J rack is a regular error. The kayak must be aligned with the rack’s arms to rest securely and evenly. Failure to do so might cause an unbalanced load, making kayak transport unsafe.
Not securing the kayak is another error. Make sure the kayak is securely attached to the J rack before driving. Use good straps and tighten them. Neglecting this step might cause the kayak to move or fall off during transport, endangering you and other vehicles.
Many kayakers hurry loading. Be patient while putting your kayak onto the J rack. Rushing might cause sloppy and thoughtless moves that damage your kayak or rack.
Finally, not distributing weight equally over the J rack might undermine kayak stability. Put the kayak in the middle of the rack, balancing its weight on both arms. This will keep the rack and car balanced and reduce strain.
Be aware of these typical pitfalls and take steps to have a successful and stress-free solo load. Don’t be afraid to practice putting your kayak into a J rack securely and confidently.
7. Safety measures to remember
Always prioritize safety while placing a kayak into a J rack. Mastering the method is crucial, but taking steps to guarantee a safe and easy loading procedure is too.
Before loading your kayak, put on safety gear. A well-fitting life jacket and solid, traction-friendly shoes are needed. Having a companion around to help you is also recommended.
Check that the J rack is properly fastened to your car before hoisting the kayak aboard. Check for damage or wear that might impair its stability. A dependable and well-maintained rack is essential to avoid loading mishaps.
Lift the kayak properly to minimize strain or damage. Instead of using your back, bend your knees and utilize your leg muscles to raise the kayak. To reduce physical strain, use a kayak loader or slide if the kayak is heavy or cumbersome.
To carry the kayak safely, center and balance it on the J rack. Make sure the kayak is firmly fastened by the rack’s straps or tie-downs and not swaying.
Remember to check for overhead impediments like low-hanging branches or buildings before placing the kayak onto the rack. Take note of your vehicle’s height clearance and be careful to prevent kayak and surrounds accidents.
Finally, load and secure your kayak according to the manufacturer’s recommendations. To load safely, follow the manufacturer’s instructions for your kayak.
By taking these safety procedures, you may securely load your kayak into a J rack while protecting yourself, your kayak, and others.
8. Practice makes perfect: solo loading tips
When doing it alone, loading a kayak into a J rack might be intimidating. However, with experience and the appropriate tactics, solo loading may be effortless.
First, choose a good practice spot. Find an area with adequate room for your kayak and a sturdy surface. This may be your driveway, a calm parking lot, or a neighboring park with open space.
Start with your kayak parallel to your car and the J rack aligned with the cockpit. Keep the J rack tight and fitted to your kayak’s width. Make sure the straps are fine before continuing.
The essential phase is hoisting the kayak onto the J rack. This is simpler with a towel or foam pad on the back of your car to protect the kayak and car.
Stand behind the kayak, bend your knees, and grip the cockpit with both hands. Lift the kayak using your legs and core, maintaining a straight back to avoid strain and damage.
Lift the kayak and gently position the cockpit on the J rack, aligning it with the cradle. Center and balance the kayak as you slowly lower it. To ensure stability, step back and examine positioning.
Fasten the straps around the kayak and J rack to secure it. Make sure the bow and stern straps are tight enough to retain the kayak. Secure the kayak’s midsection by tightening the straps equally on both sides. Make sure each strap is secure and won’t loosen during travel.
Final check is necessary after packing your kayak. Shake the kayak gently to ensure it’s firmly connected to the J rack. Check the straps again for tightness and positioning. These additional steps will offer you peace of mind and avoid travel accidents.
It takes practice to perfect. More you practice putting your kayak into a J rack, the better you become. You’ll discover your greatest methods over time. Don’t give up if it’s hard at first. Keep practicing and you’ll be an expert at solo kayak loading into a J rack.
9: Use the single load approach to kayak easily
Finally, the single load approach for putting a kayak on a J rack is a game-changer for kayakers. This approach enables you to kayak easily and confidently.
No longer do you need assistance loading and unloading your kayak. Solo load kayaking lets you manage your experience and explore the waters whenever you choose.
Following these step-by-step instructions, you can put your kayak onto a J rack without help. This strategy saves time and gives you freedom and achievement.
Safety first throughout the procedure. Keep your kayak firmly tied to the J rack, double-check all connections, and follow manufacturer instructions.
With repetition, the single load method will become part of your kayaking routine. No more kayak loading and unloading hassles. Instead, enjoy the peace and delight of open sea.
10. Wrapping Up
So embrace the single load strategy, get the gear, and have many great kayak experiences. You may boldly explore new areas, find hidden jewels, and make memorable aquatic experiences with this new talent. Happy kayaking!
Our blog article on mastering the solo load for kayak loading on a J rack should have been useful. Loading a kayak onto a J rack alone is difficult.
This article’s approach will allow you to comfortably load your kayak onto the rack by yourself, saving time and effort. Take your time and consider safety while doing this activity. Kayak out and enjoy the open seas!